
Below is the process I use to make my own homemade yogurt. I make both regular and Greek-style yogurt. Both processes are listed below.

Supplies
Heating Pad
1 Large Pot
1 Large Pan with Handles and a Lid (Make sure this pan will fit inside your large pot)
Kitchen Thermometer
Metal or Plastic Stirring Spoon
 Plastic Container with Air-Tight Lid
Cheesecloth, Colander, Plastic Wrap and Large Bowl *if you are making Greek style yogurt

Ingredients
2 to 3 T. Yogurt which must contain Live Active Cultures and/or Probiotic
1/2 Gallon Milk
Directions:
Put 2-3 T. of yogurt containing live/active cultures in a small bowl and let it come to room temperature. Put heating pad on the bottom rack of your oven and turn the heating pad temp to medium heat.

Pour 1/2 gallon of milk into a large pan with handles. Fill a larger pot with water. Set the pan of milk inside the large pot of water, and let the handles of the milk pan rest on the sides of the pot. The water level should be slightly lower than the level of milk inside the pan.

Why use the larger pot of water? The water will act as the heat source to heat the milk pan on all sides. I do this because milk has a high sugar content and therefore burns very easily. If you heated the pan of milk directly on the stovetop it would be a lot more likely to burn and stick to the bottom of your pan.
Heat milk to a temp of 185 degrees and hold for 5-25 minutes. Stir frequently to keep milk from burning on the bottom and sides of the pan. During this part of the process you are sterilizing the milk.

After you've sterilized the milk, let it cool to 110 degrees. I put ice cubes and water in the sink, then set the pan in the ice water to speed up the cooling process. As soon as the milk reaches 110 degrees, stir in the 2-3 T of yogurt. Stir vigorously!

Once the yogurt has been stirred in, cover the pan with a lid and set on top of your heating pad in the oven. Cover it with a dish towel and close the oven door. Leave it in the oven for 8-36 hours. The yogurt is fermenting during this time. Because sugar is "eaten" by the live bacteria cultures during the fermentation process, the shorter the fermentation period, the sweeter your yogurt will be. The longer the fermentation, the more tangy(and healthy!) the yogurt will be. Most commercial yogurts are fermented for about 6 hours.
Also I should note here that the type of milk you use also affects the taste of your yogurt. The higher the fat content of the milk, the sweeter it will taste. Given the same fermentation time, whole milk will give you the sweetest yogurt, followed by 2%, then 1%. Skim milk will produce the tangiest yogurt, but it will also contain the least amount of fat. My personal preference is 2% milk with a 24 hour fermentation.

Once you've reached your desired fermentation time, its time to take the yogurt out of the oven. When you take off the lid, you will see that the milk has separated into the curds and whey. The thick white part on the top is the curds. The whey is the clear liquid on the bottom, although a thin film is often covering the curds.

Stir the curds and whey together thoroughly and pour into an air-tight plastic container. Put it in the refrigerator for at least 8 hours. After you've patiently waited for 8 hours, its time to taste your yogurt! Stir it each time you take it out of the fridge. Your homemade yogurt with be a thinner consistency than most commercial yogurts. It mixes well with honey, granola, bran flakes, cereal, fruit, etc. You can mix it with protein powder to make great protein shakes too.

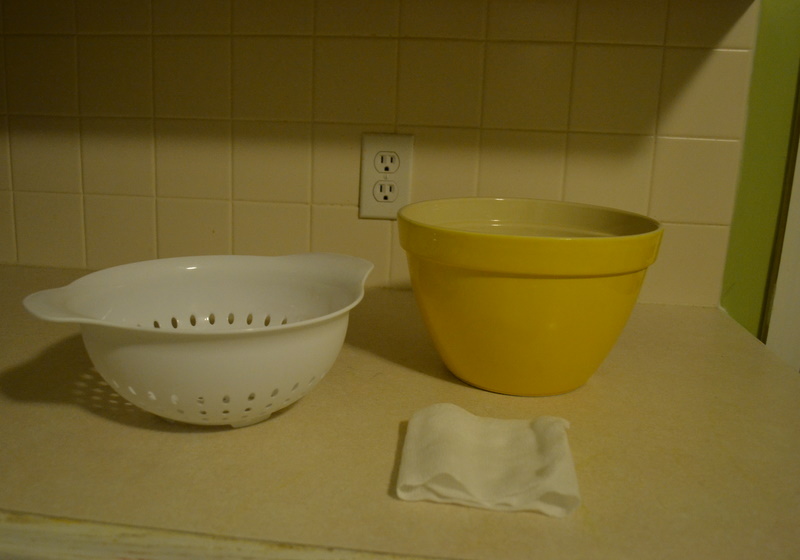
To make Greek style yogurt, follow all the same steps until the fermentation is complete. Now you'll need the colander, large bowl, cheesecloth and plastic wrap. Set the colander inside your large bowl. Make sure there are a couple inches between the bottom of the colander and the bottom of the bowl. Line the colander with a few layers of cheesecloth.

Take your yogurt out of the oven, and dump it into the colander/bowl. Cover the colander/bowl with plastic wrap and set it in the refrigerator for 12 hours to strain.
 |
| Fresh out of the oven |
 |
| After 12 hours in the fridge |
When the straining process is finished, remove colander/bowl from fridge. Take the curds that are remaining in the cheesecloth and put into a plastic container and stir. It will be a little thicker consistency than sour cream or Greek style yogurt that you'd buy at the store. If you wish to thin it out a little, use a spoon to stir in some of the whey.
 |
| The finished product! I like to reuse old yogurt containers for storage. |
Like regular yogurt, it is also great with fruit, granola, or honey. I like to use it as a healthier substitute for mayo or sour cream when I am cooking. It is also great on omelets or as a topping for nachos, chili, Mexican foods or anything else you'd top with sour cream.
No comments:
Post a Comment